Viewing videos
Here you can find an overview of the options available when viewing videos.
The options listed here apply to uploaded videos: standalone, inline, and standalone embedded as inline. Depending on the community configuration, the video settings, and how they were uploaded, some of the options may be unavailable.
Videos embedded from third-party providers, such as YouTube or Vimeo, use the functionality of the video source, and the experience with such videos differs.
Viewing videos with captions and transcriptions
If a video has captions / transcriptions, you can view it with captions or transcriptions (or both) turned on. Captions appear on the video itself, while transcripts appear next to the video. You can select if you want to view a video with captions or transcriptions (or both) and the languages they should be displayed in.

To turn captions on:
- While viewing a video, click
 and select a language from the available list.
To turn captions off:
- While viewing a video, click and select Captions off.
To toggle transcriptions:
- While viewing a video, click
 .
.
To change the transcription language:
- While viewing a video, click and select a language from the list.
How captions look in the video player can be additionally configured.
Changing the video quality
By default, videos are played with the best quality fitting for the device you are using and the capacity of your internet connection.
To change the video quality:
-
While viewing a video, click
 and select the desired quality.
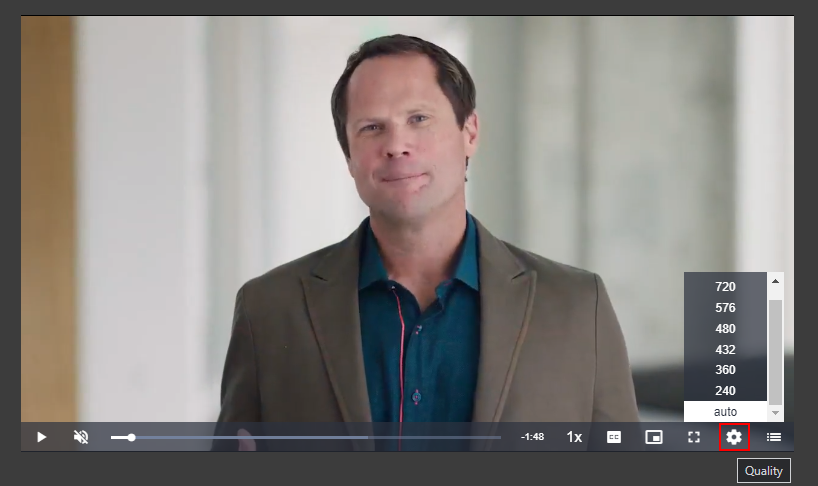
-
Select auto to return to the default setting.
Changing playback speed
You can choose to watch videos at faster or slower speeds.
To adjust playback speed:
-
While watching a video, click
 and select the desired speed.
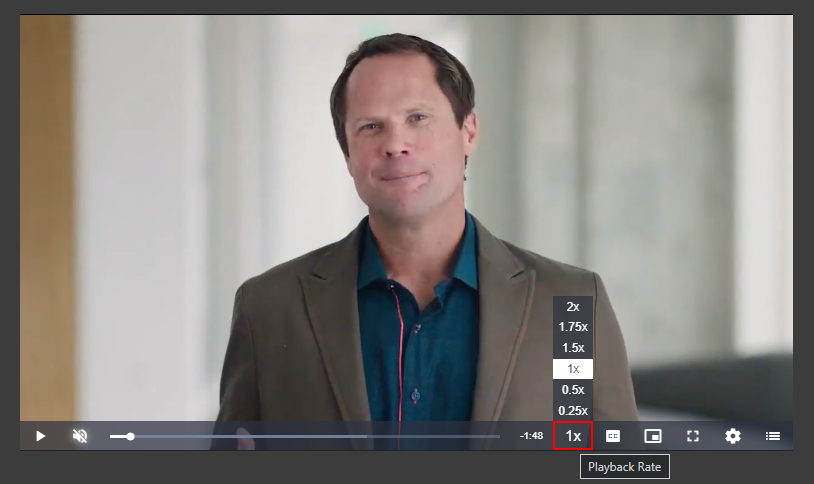
Viewing at fullscreen
Viewing a video on fullscreen is more comfortable at times.
- While viewing a video, click
 to switch to the fullscreen mode.
 - To switch back, click
 or press
 Esc.
Viewing in the picture-in-picture mode
With picture-in-picture enabled, you can continue viewing a video while switching to another document or application.
The video is played in a special mini box. It stays on top of all other documents and applications, and you can drag it to any place on your screen.

To switch to the picture-in-picture mode:
- Open a video and click
 and drag the miniaturized video to a place on your screen where you'll comfortable watching it.
To turn the picture-in-picture mode off:
- Click
 on the miniaturized video OR
 - Click
 on the video tab.
Configuring captions in the video player
Captions are displayed over a video and at times you may want to configure them to be comfortable to read.
To configure captions:
-
While viewing a video, click
and select caption settings.
-
Specify color and opacity for the caption text, text background, and window.
In the example above, the text color is set to yellow, the background color to red, and the window color to cyan.
-
Specify the size, edge style, and type for the font.
In the example above, the text size has been increased, the edge style set to raised, and the font type changed to monospace.
-
Click Done to save the changes and continue watching the video.
Note: These settings apply only to the video you are currently viewing.
To restore the default settings:
- While viewing a video, click and select caption settings.
- Click Reset to restore the settings.
- Click Done to save the changes and continue watching the video.
Downloading captions / transcriptions
You can download captions / transcriptions of a standalone uploaded video as long as you have permission to access the video.
You can download any or all available caption / transcription files. If you need to make changes to auto-generated captions, you can download the caption file and edit it before uploading it back to your video.
Caption / transcription files are downloaded in the WebVTT (.vtt) format. Note that video downloads may be forbidden in your community. In this case, you won't see the downloading link when viewing videos.
To download the caption / transcription files of a video:
-
Open the video.
-
For every language you need, select Download > Caption - <language> to the right and specify where to save the file.

The selected files are downloaded to your computer.
Jive video player interface
Here you can find the details of the video player.

(1) Play/Pause : Toggles video playback.
(2) Volume/Mute : Adjusts the volume for the player. You can also mute it completely.

(3) Video track : Shows which part of the video you are viewing.
(4) Video duration : Shows the time before the video end. In this example, the video would end in 1 minute 51 seconds.
(5) Playback rate : Toggles video playing speed. You can speed videos up or slow them down as required. The normal speed is 1x.

(6) Captions : Toggles captions and allows configuring how captions are displayed.
: With captions enabled, the video would look like this:

You can turn on captions in one of the available languages (if any), turn them off completely (captions off). You can also configure how captions are displayed on the interface by clicking caption settings and adjusting the settings.

With the caption settings, you can make them easily readable for you. In the example below, the font is changed and its size is increased, the text and text boxes are colored to make the text stand out. If you want to restore the default settings, click Reset.
(7) Picture-in-picture : Toggles picture-in-picture mode when you can switch to another document or application while still viewing the miniaturized video.
(8) Fullscreen / Inline
: Toggles the fullscreen mode. Click the button again or press Esc or F11 to switch back to the normal-sized video.
(9) Quality : Toggles the quality of the video.

With the auto setting enabled, the playback is adjusted to the best quality depending on your screen resolution and the internet connection speed. You can select another setting manually if you want to.
(10) Transcription : Toggles transcriptions.
![]()
You can select which language you want to use or turn them off completely.
Captions in inline videos
If you need to have captions in an inline video, you can upload it as a standalone video, and then insert it into your blog post or document.
Adding captions / transcriptions to uploaded inline videos in content items and comments is not supported. At the same time, an uploaded standalone video amounts to a separate item that can be embedded into other content items similar to how you can embed a YouTube video. When embedded, such videos can be played with captions enabled.

For more information about embedding community-published videos, see Inserting inline videos into content items and comments.
Uploading standalone videos to the community
Use ![]() to create new standalone videos
to create new standalone videos ![]() for your community. It can contain either an uploaded video or a link to a video from another site.
for your community. It can contain either an uploaded video or a link to a video from another site.
These videos are published as the Video content type ![]() and are visible when you browse community content as separate content items.
and are visible when you browse community content as separate content items.
For more information about the requirements for video files, images for thumbnails, and caption / transcription files, see Supported video providers and formats.
To create a standalone video by using ![]() :
:
-
In your community, click
 > Video.
The Publish a Video page opens.
-
Under Select a Video Source, select Upload. Browse for the video on your machine, select the file, and then click Open.

The video is uploaded to the community and then prepared for storage. You won't be able to publish the video until the process is completed.

Once the video is uploaded, the next processing stage starts. At this time, the video is encoded for storage and playback and three thumbnails are auto-generated.

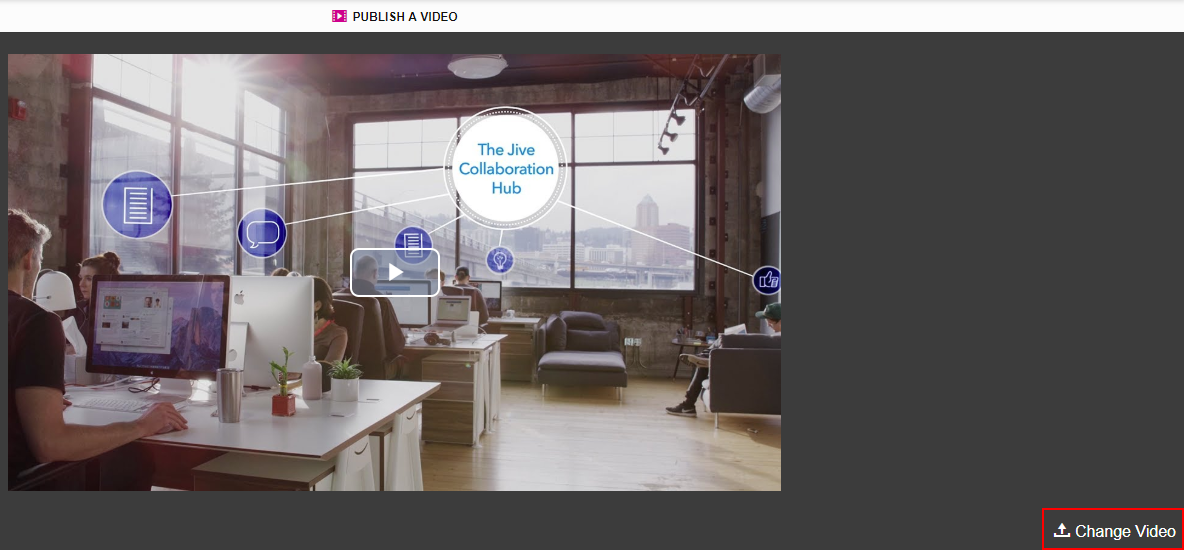
-
If you want to change the video file, wait until the video becomes viewable and click Change Video on the right, and then repeat Step 2.
-
Add a title and description for the video.
-
Under Publish Location, select where you want to publish the video.
Note that you cannot publish a video only for yourself.
-
Under Tag This Video, specify the tags for this video.
-
Under Categories, select the categories.
The category selection depends on the publishing location.
-
Under Video Thumbnails, click on one of the available images to be used as the video cover.
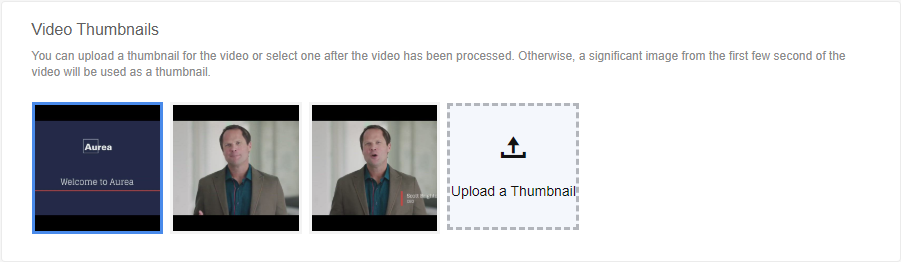
You can select one of the auto-generated thumbnails or upload your own (click Upload a Thumbnail and upload the desired cover image). You can upload multiple images, but only the image you select will be used as the thumbnail – it is framed with a blue outline. In the example above, the first image is selected. Other uploaded images are discarded when you save the video.
By default, the video thumbnail should be at least 640 pixels wide with the file size less than 2 MB in one of the supported formats: JPG (.jpeg, .jpg), static GIF (.gif), BMP (.bmp), PNG (.png). Animated GIFs are not supported. For the best fit, it should be rectangular with a 4:3 ratio. Images with other proportions are automatically adjusted to fit.
-
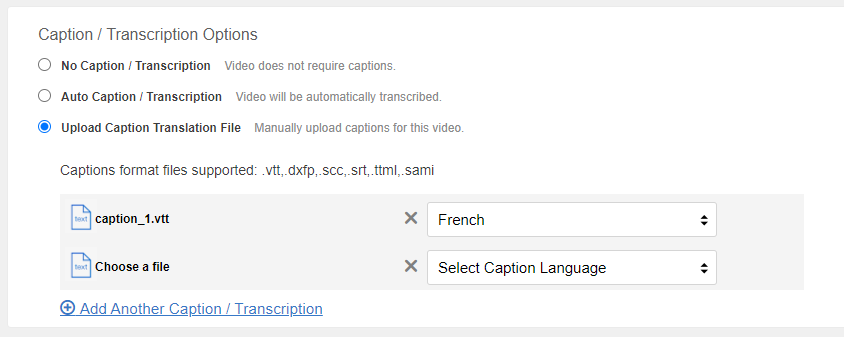
Under Caption / Transcription Options, choose one of the options for caption / transcription:
-
If you don't need captions / transcriptions, choose No Caption / Transcription.

-
If you want to have captions / transcriptions auto-generated and select the original video language from the list, choose Auto Caption / Transcription.

Note: If auto-generating captions / transcriptions is disabled, you won't see this option but you can upload prepared captions / transcriptions anyway.
-
If you want to use prepared caption / transcription files in one or several languages, choose Upload Caption Translation File. Then upload the caption / transcription files marking each with the language it has been designed for.
-
-
Click Publish.
Note that this button is unavailable until the video is fully uploaded.
When you click publish, you start the next – complex – stage of the video processing. During this stage, the speech in the video is converted to text and translated to the required languages. Besides that, the video is analyzed to add more context to the video. Processing may take some time; the video duration, the number of captions to be generated, and the general service availability may affect the overall time.

Which files are auto-generated depends on your community configuration. If translations are enabled for your community:
-
If you selected Auto Caption / Transcription, Jive generates all caption / transcription files for the languages configured for translations.
Later you can download the autogenerated caption / transcription file, edit it in a text editor, and upload it back.
-
If you selected Upload Caption / Translation File and uploaded one or more custom caption / transcription files, Jive generates files for all languages configured for translations.
If translations are disabled for your community:
- If you selected Auto Caption / Transcription, Jive generates only caption / transcription files for the source language of the uploaded video.
- If you selected Upload Caption / Translation File and uploaded one or more custom caption / transcription files, Jive keeps the uploaded files only and does not generate any additional translations.
After the processing is finished successfully, the video appears in News and activity feeds and an Inbox notification is sent to the author. The video also appears in searches, and you can search not only by the title and description but also captions / transcriptions if they are available for the video.
For detailed information about uploaded standalone video processing, see About Jive Video provider.