Advanced Navigation Add-on
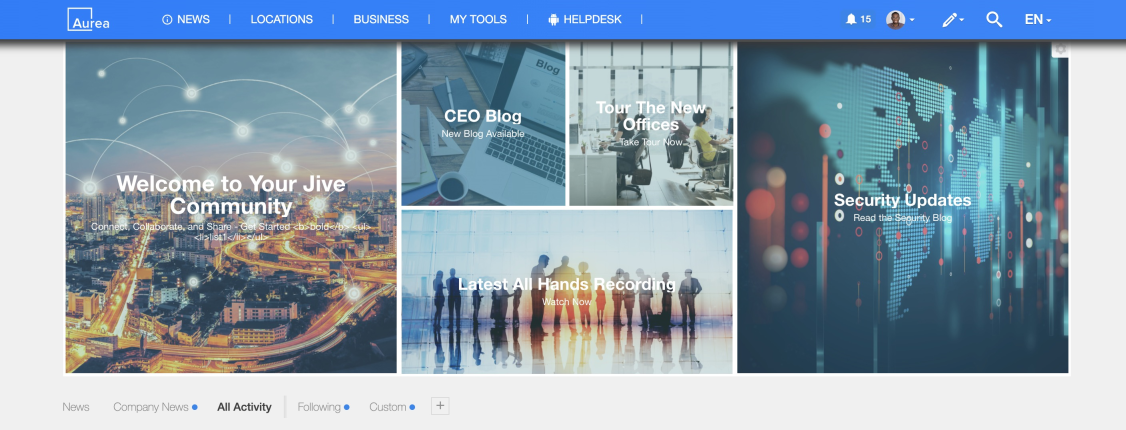
The Advanced Navigation Add-on allows customizing the look and experience of your Jive instance’s navigation. With this add-on, you can improve usability, drive users down key paths, and help them find what they are looking for. Benefits include:
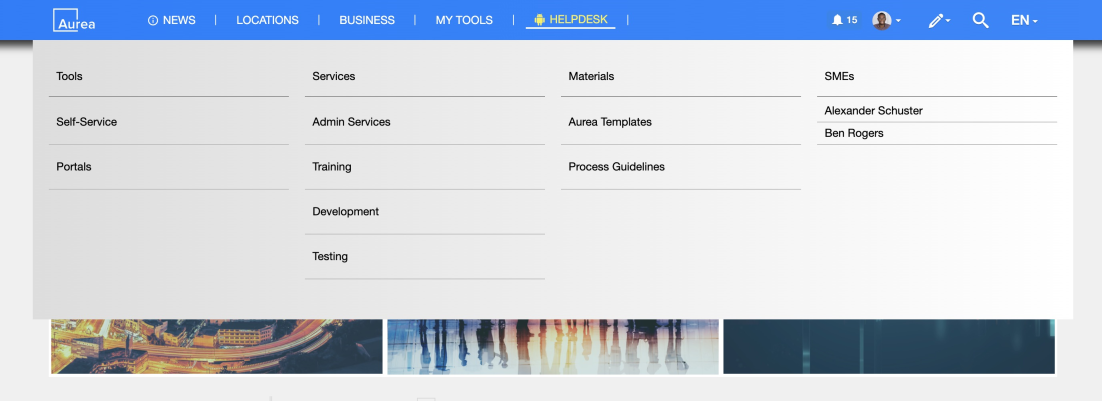
- Replace or add individual links to the existing header navigation of Jive.
- Administer the navigation structure with easy drag and drop editing.
- Create horizontal and vertical menus.
- Add images or text elements to your menus.
- Translate navigation items in all Jive supported languages.
- Utilize a large icon library to highlight elements.
- Fully responsive design ensures your menu renders correctly on any browser or device.
- Fine-grained control over menu item styling.
- Visibility rules to show or hide items based on profile information or user group membership.

Installing and Configuring Advanced Navigation Add-on
The Advanced Navigation Add-on requires Jive instance configuration before installation. Configurations are performed by Support or the PS teams. Open a support ticket with Support to install this add-on.
A user must have at least Manage System permissions to install add-ons. This add-on also requires connectivity to Jive Cloud Shared Services.
User interface: Your avatar > Add-ons
Installation Process
Installing from the Add-ons page
To install the Advanced Navigation Add-on from the Add-on Registry:
- In the user interface, click on your avatar in the upper-right corner, and then select Add-ons to open the Add-ons page.
- On the Add-ons tab, select All Add-ons on the right, and then select Available at the center of the page to see all available add-ons.
- Find Advanced Navigation Add-on in the list and click Install next to it.
- In the Confirm Install box, select if the add-on should be visible to all users:
- To verify that the add-on is installed, go to the Add-ons tab, then select All Add-ons > Installed, and find the add-on in the list.
The Advanced Navigation Add-on is installed.
Installing from a package
To install the Advanced Navigation Add-on from a zipped package:
- Download the latest version of the add-on.
- In the user interface, click on your avatar in the upper-right corner, and then select Add-ons.
- On the Add-ons tab, select All Add-ons on the right, and then click Upload Package.
- On the Upload Package page, choose the package file you have been provided.
- Select if the add-on should be visible to all users:
- To verify that the add-on is installed, go to the Add-ons tab, then select All Add-ons > Installed, and find the add-on in the list.
The Advanced Navigation Add-on is installed.
Configuring the Advanced Navigation Add-on: Initial Setup
After installing the Advanced Navigation Add-on, complete the initial setup:
-
Go to User interface: Your avatar > Add-ons > All Add-ons > Installed.
-
Find Advanced Navigation in the list, click the gear icon > Settings.
-
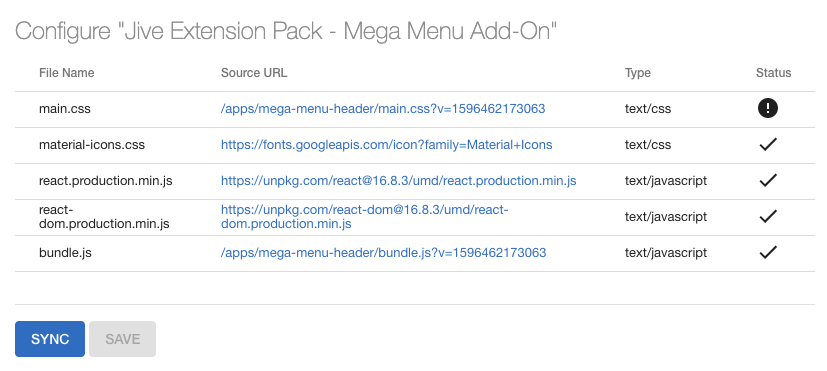
Click Configure Now. A list of files that need to be synced with the root space will show:
Note: If all files are up to date, no sync is required.
-
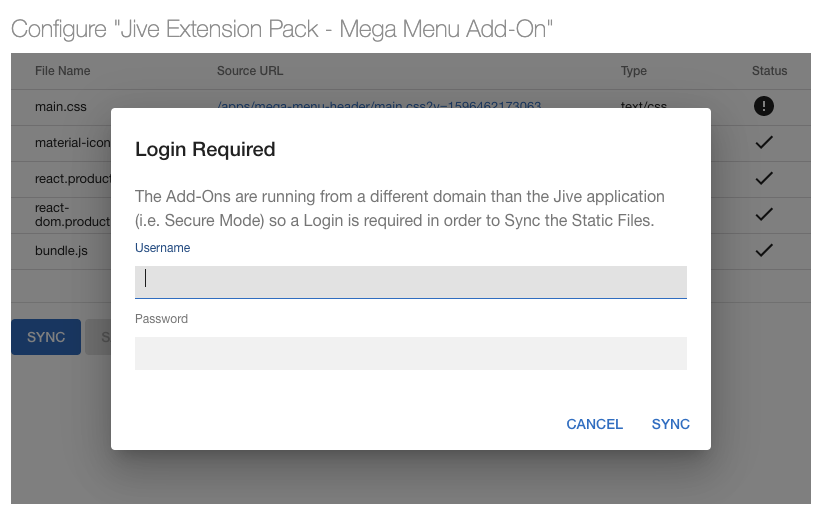
When clicking on Sync, if the add-ons are running on a different domain than the Jive application (secure mode - default behavior), enter the credentials of the current user, ensuring it is a non-federated account with full admin access permission:
-
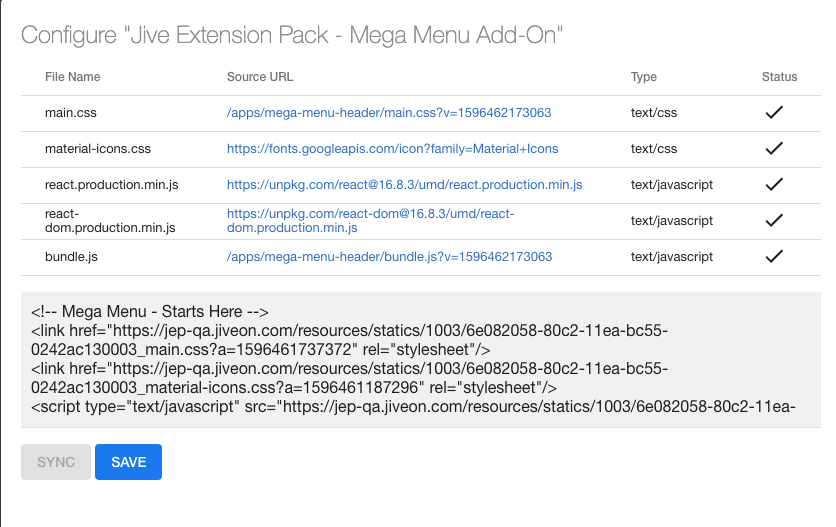
Once the sync is completed, status icons should all be checkmarks. The custom header code that needs to be added in Jive will be shown:
-
Copy the displayed custom header code.
-
Click Save and then Save and Activate on the next screen.
-
Go to Your avatar > Themes > Advanced > Custom Header to configure the community theme.
-
Add the HTML code generated in Step 6 in the Custom header HTML box.
-
Save and Publish this new theme.
-
Access the configuration page via:
<instance URL>/apps/mega-menu-add-on.
Configuring User Groups for Advanced Navigation
The Advanced Navigation add-on uses user groups to provide secure access to its features. Only members added to specified user groups can access and configure the Advanced Navigation add-on settings.
To configure user groups for the Advanced Navigation add-on:
-
Go to the user group configuration page:
- Admin Console > Permissions > User Groups
- Advanced Admin Console > People > Management > Create User Group
-
Under General Settings, enter a user group name and click Create Group. For example, create a
Advanced Navigation add-on editorsuser group. -
Add the concerned administrators as members to this user group.
-
Save the changes.
-
Next, go to User interface: Your avatar > Add-ons > All Add-ons > Installed.
-
Find Advanced Navigation in the list, click the gear icon > Settings.
-
Under App Security, click the gear icon next to Advanced Navigation.

User groups with access to the
Advanced Navigation add-on editorsfeature are listed here. By default, the All registered users user group is used. -
Remove All registered users and add the user group which should have access to the feature. In this example, add the
Advanced Navigation add-on editorsuser group. -
Save the changes.
Members of the specified user groups (Advanced Navigation add-on editors in the example) can now configure and use the Advanced Navigation add-on.
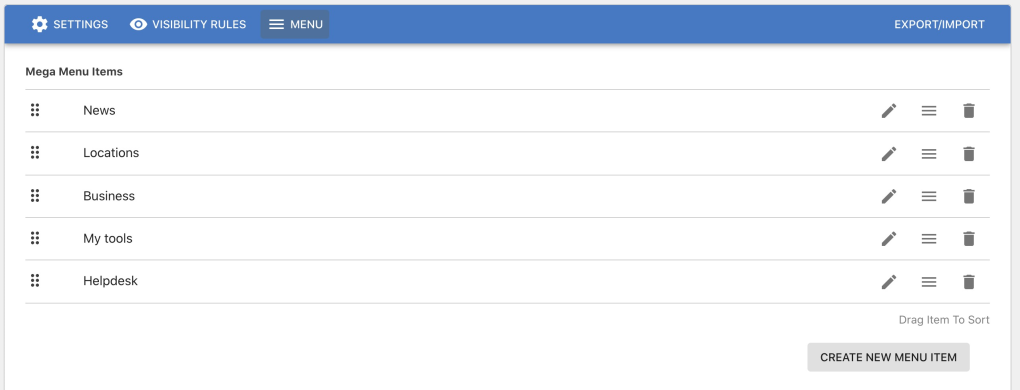
Exporting and Importing Menu Configuration
The Export/Import feature allows you to use a configured Menu on another instance or save previous configurations as a backup.
To use the currently configured settings in the Advanced Navigation add-on on another environment or instance:
-
On the Advanced Navigation configuration panel, click Export/Import.

-
Copy data.
-
Click Save to save the Settings.
-
Click Save Menu Settings to save all the configured settings.
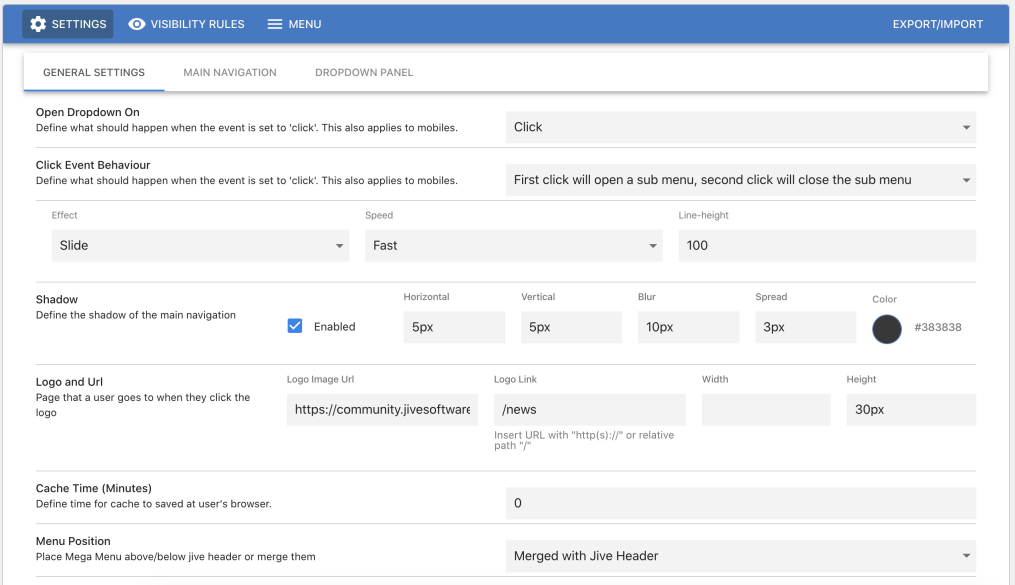
Configuration Panel
To configure the Advanced Navigation Add-on, ensure that the appropriate user is added to the user group (e.g., Advanced Navigation add-on editors). Access the configuration via:
- Apps > Advanced Navigation
- Create Menu > Advanced Navigation Configuration
- Direct Link:
<instance URL>/apps/mega-menu-add-on
Configuration Options:
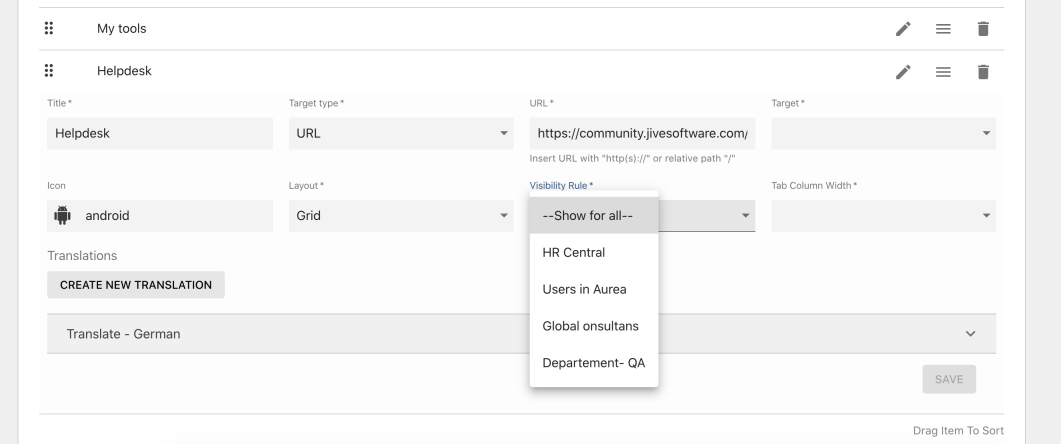
- General settings: General settings of a menu.
- Elements of Visibility Rules: Define visibility rules for menu elements.
- Elements of Menu Settings: Define the contents of a menu.
- Installing Advanced Navigation Add-on: Requires Jive instance configuration and add-on installation.
- Configuring access to the Advanced Navigation Add-on: User groups determine access.
- Exporting and importing Menu configuration: Use this feature to save or transfer configurations.
- Examples of Advanced Navigation configuration: View examples of Advanced Navigation configurations.