Configuring Jive to use Claims
You need to configure Jive to use Claims before installing the Jive for SharePoint add-on.
Admin Console: System > System properties
To configure Jive to use Claims:
-
In the Admin Console, go to System > System Properties.
-
Add the following system properties:
-
Set
registration.domainRestriction.domainstojivesoftware.com,jiveland.com,jivelandia.com.The property refers to the Jive domains of the clients.
-
Set
jive.use.strict.httpstofalse.This property is optional.
-
-
Contact Support to set up the following for you:
-
Set up
registration.domainRestriction.domainsandjive.use.strict.httpssystem properties. -
Configure SAML SSO, if required.
-
-
To use Claims ID mapping instead of email mapping:
-
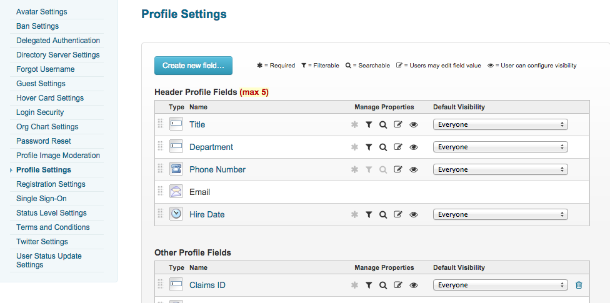
Go to People > Settings > Global Profile Settings.
-
Click Create new field.
-
In New Profile Wizard: Step 1 of 2, choose the Text Field type, then click Continue.
-
In New Profile Wizard: Step 2 of 2, in Filed Name,
-
Under Translations, type
Claims IDfor the English translation.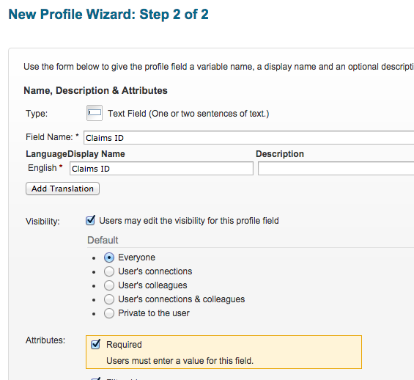
-
-
Under Attributes, select Required.
-
Click Finish.
You should now see the new parameter under Other Profile Fields on the Profile Settings page, as shown in the following image:
-
To configure SSO:
-
Go to People > Settings > Single Sign On.
-
On the SAML tab, click Enable.
-
Copy the content from the following federation file and paste into the large text box on the Metadata tab:
https://adfs3.iqc01.com/FederationMetadata/2007-06/FederationMetadata.xml.iqc01.com: The domain name of the servers (ADFS, SharePoint, Web Apps).adfs3: The hostname of the ADFS.
-
Click Save all SAML Settings.
-
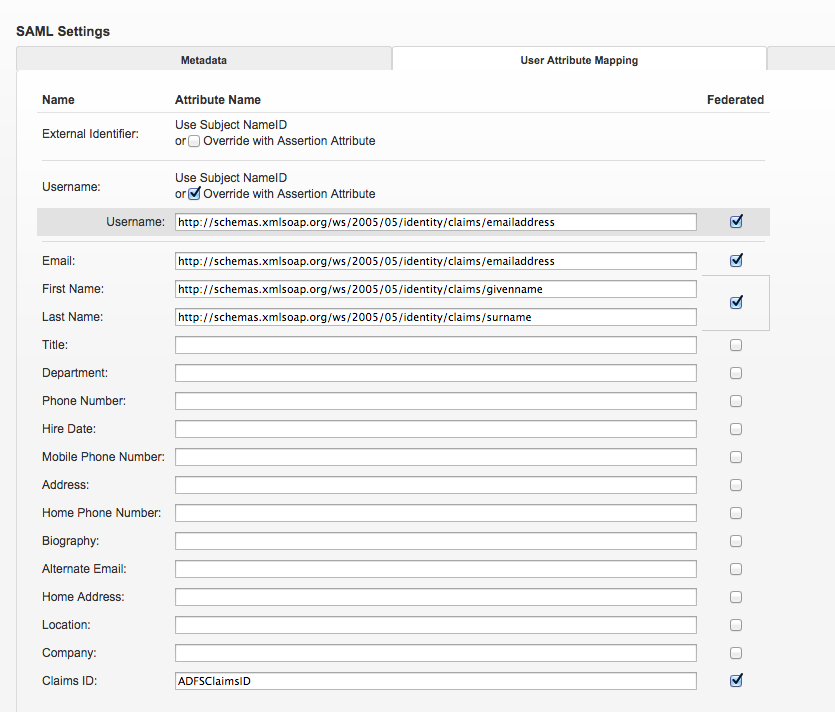
Go to the User Attributes Mapping tab.
-
Complete the form by adding the URLs into the Username, Email, First Name, and Last Name fields, as shown in the following image:
-
Click Save all SAML Settings.
-